Showing posts with label christmas. Show all posts

Thursday, December 17, 2009

WE ARE SPONSORING DAY 17 OF THE 24 DAYS OF CHRISTMAS

Check out SHOW & TELL AND SCRAP PAGES - 24 DAYS OF CHRISTMAS CHALLENGE!

Sunshine's Stamps is sponsoring the challenge today. The challenge is to make a snow globe card or project.

Here is a link to a great SCS tutorial

Here is a link to cool snow globe images to use.

and finally here is a snow globe you can use as a template if you need a helping hand.


I hope to see you over at Show & Tell and Scrap Pages playing along with some of their awesome challenges soon!

This challenge is open until Friday evening and the winner will receive their pick of 3 images from our online store. All entrants will receive our SEASON`S GREETINGS image FREE as our thanks for playing along.


Thanks for stopping by and I hope you play along!

Sunshine:^D

Saturday, November 21, 2009

NEW CREATIONS FOR CYSD

DESIGN TEAM POST FOR CRAFTING YOUR SPECIAL DELIVERY


Good morning all! It has been ages since I posted anything and for that I do apologize! I decided a while back that it would be interesting to take a Tax Course to get myself out of the house 3 days a week. Well, I really didn't think it would impact my schedule as much as it has! Unfortunately my design time has been cut somewhat and my ability or willingness to cut into my time with hubby has just not been there. I will get it all sorted out soon, so bear with me while I get my schedule rescheduled! LOL!!

Today is my post for my good friend Gina over at Crafting at Your Special Delivery . We have been challenged to make adorable pop up cards...of course Gina was terrific and gave us written instructions as to how these worked...but being a see it and learn it kinda gal...the instructions were too simple...and nothing can be that simple...so....I made it way more difficult than need be! LOL!! I ended up making a couple of variations on the theme until Gina kindly sent me a pic of what she meant...which of course jived PERFECTLY with her written instructions!! So I am going to show you all the whole works because...well because I made them and I think you will enjoy them.

The images are The Night Before Christmas, Chilly Penguin and Snowman and they are just sweet.

First let me show you Chilly Penguin in a two sided fold card that allows Chilly to stand up straight when laid out flat on the table.


I coloured this little guy using my Bic's and Sharpie's and a couple of Prisma Colour Markers as well. He has Snow Writer snow on the ice to give it some sparkle and lots of snowflakes. I used first,second and third generation stamping on the sentiment die cut with my snowflake stamps from Artful Inkables to create different intensities of snowflakes.

If you aren't sure what I mean...First generation stamping is simply stamping your impression after you have inked your stamp up. Second generation is inking your stamp and stamping it on scrap paper and then stamping it on your project creating a slightly faded impression, third generation is when you stamp your stamp on your project creating a significantly faded impression. This creates interest and depth of field in your background. I find it really effective with flowers and snowflakes. Give it a try...I bet you'll like it as much as I do.

This image if of the front of the card, with the sentiment, which is also from Artful Inkables. This image is the back of the card and features a giant acrylic snowflake on the base.

The Joy stamp on Chilly's belly is from Artful Inkables as well. I just love this versatile set at Christmas. I don't own very many Christmas stamps and those I do were purchased for their versatility.

The second pop up card I made features Gina's adorable snowman. For this one I created a card that folds and when you open it, the snowman inside pops out on his own little box hinge. I used the same image on the inside and outside of the card. On the outside I coloured the image with my Prismacolour markers and then covered the entire image in a sheet of clear adhesive which I then covered in microfine glitter. The effect is just sweet. The snowman's eye's and buttons are embellished with black adhesive rhinestones I picked up at the Dollar Store.


I embellished the rest of the card front with coordinating ribbon and foam snowflakes. The dp is from my Christmas stash from last year when I didn't know any better to keep the information on the maker!! So..it's a mystery!! LOL!! The cs is all Bazzill and the rhinestone in the centre of the snowflake is from the Dollar Store as well.

Inside the card I used first, second and third generation stamping and embossed the works of the snowflakes with clear embossing powder to give the inside of the card extra detail since it has been designed to be propped open to show off the snowman inside.

I have used Snow Tex on the hat and base of the snowman for a 2D effect and layered on snowflakes in silver, white and blue. The Season's Greetings sentiment and the Holiday's sentiment are both from Michael's. Once again I used Dollar Store adhesive rhinestones for the snowman's eyes and buttons.

Now for what I was SUPPOSED to make...well...kinda!! LOL!! I can never keep anything super simple...I have to alter it in some way. Gina's images came all neatly boxed in frames she created and all we had to do was use our Xacto knives to cut the upper portion of the image free and fold the bit that was left back to make the support for the card! Easy Peasy...right?! WRONG! I decided I wanted to add space for a sentiment to a couple of the images so I added card stock to their bases and embellished them. The first one though is created the way Gina's instructions indicated.


If you click on the image and it gets bigger you will clearly be able to see the snow writer glitter glue that I used on the chimney and roof top for interest and the Diamond Glaze on this nose and boots. He has been coloured with an assortment of Bic`s, Sharpies and Prismacolour Markers. Hope you like him...I envision him made in mass quantities for the kinder to take to school for sharing with their buddies.

Next up we have Chilly and the Snowman. Both were created similarly. I extended their bases to allow room for a sentiment and some embellishment...c'mon! There HAS to be room for embellishment!!!


The Holiday's sentiment is from my TAC Collection. The cs is all Bazzill and the papers were from a mini 5X7 pad of textured papers and coordinating papers from Momenta. The adhesive rhinestones are from my Dollar Store stash. I used my white gel pen on Chilly's laces and to create the snowflake on the snowman's hat.

I am imagining these adorable cards a place holders on my Christmas table! What would you do with them? They are simple to make and the images are just as quick to colour up to play with! Hop on over to Crafting at Your Special Delivery to check out Gina's images and have some great fun playing along with her challenges!

Here is a final shot of all three similar pop up cards together. It's really nice to give cards of different shapes and dimensions as it allows the recipient the opportunity to display their cards in an interesting fashion!

Thanks for stopping by today. I hope your found something interesting and motivating in today's post. I am working on a couple of cool projects that I hope to post soon...final touches need to be completed...so stay tuned!

Hugz to one and all!


Thursday, November 19, 2009

PLATE #2 FINISHED

Plate #2 is Blue!!


For the second in my 8 piece set of Christmas Dinnerware I have used Sunshine's Stamps new Snowman with Tree image and "In the Meadow" sentiment to decorate this plate! I am thinking my sister-in-law will be falling for this plate heavily!! It's kinda her fave colour!!

Here are the deets on how I made this one. I coloured the images with my Prismacolour Markers and then I separated the tree's from the snowmen. All the images have been stripped down to the thinnest layer to provide as little bulk at the bottom of the plate as possible. The centre image and sentiment have been torn and frayed around the edges and inked with my Versafine Lagoon Blue ink pad and sponge daubers. To soften the effect I also sponged some Martha Stewart white over everything as well.

I used Mod Podge to adhere the images to the back of the plate. Once they were adhered in the correct positions I covered the entire back of the plate with a good layer of Mod Podge and sprinkled microfine blue glitter all over the back of the plate. After I let it dry I applied another coat of Mod Podge and glitter to the back of the plate to fill in the thin area's. Once dry the back of the plate was covered with a good layer of clear water based acrylic.

I really hope you like this one as much as I do!! Thanks for stopping by! I am off to start plate #3 before I head to bed!

Hugz,


LOOK WHAT I MADE!

Robbie and I went for a drive the afternoon of Remembrance Day. We ended up in Portage le Prairie. There is not a whole lot in Portage, let me tell you! There is however a huge Dollar Store!! {{Otherwise known as my Mother Ship}} we went in for a gander around. I was truly disappointed in their craft section! Either there are some serious crafters in Portage le Prairie or they just don't keep their craft section very well stocked.

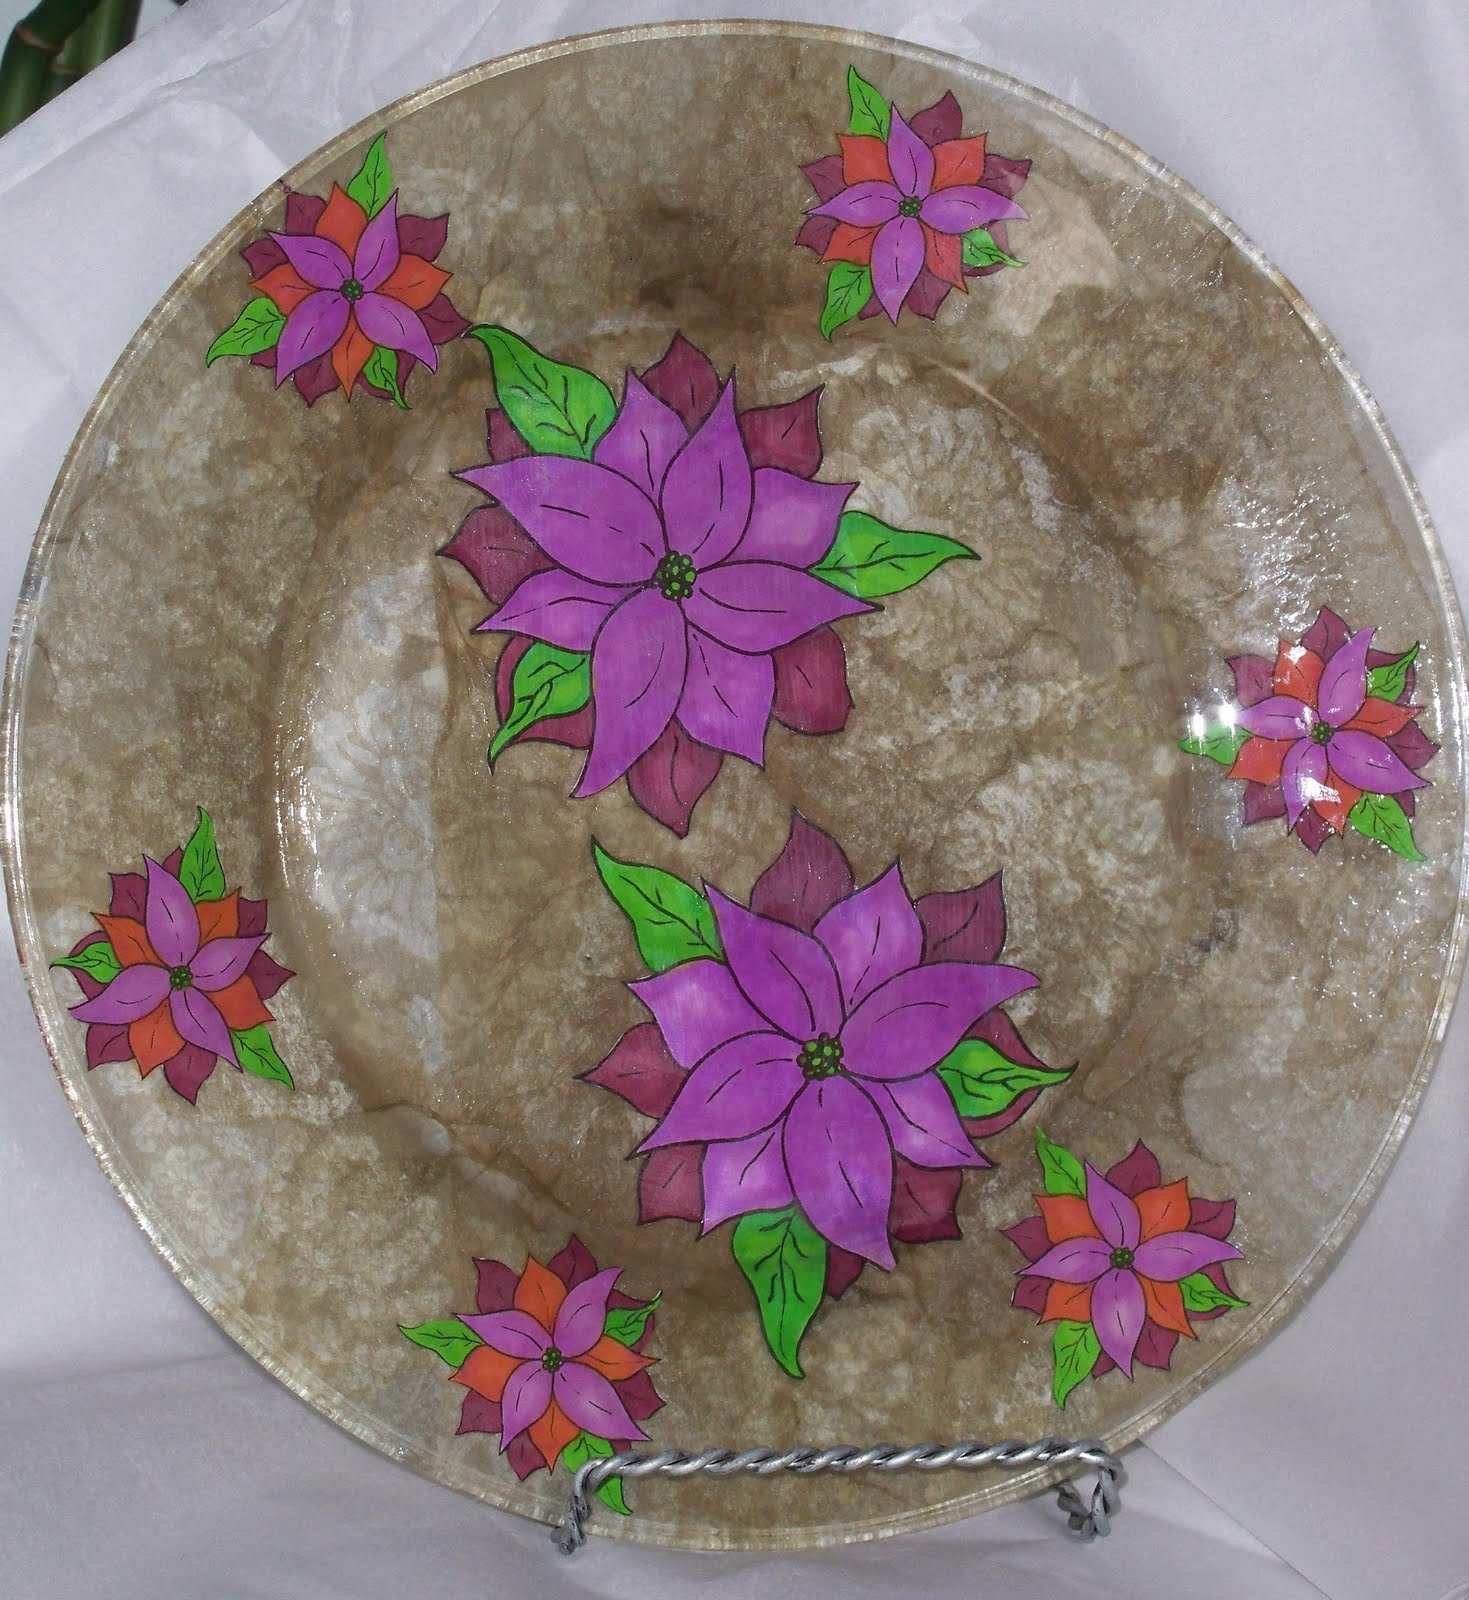
I did however stumble across these glass plates. They are plain and simple and I thought "I can do something with those" so I bought some of them!

This is the first in a series of 8 plates I am making featuring our Christmas images. No two plates will be the same! I am pretty excited about the whole thing.

Here is plate number 1 featuring our Poinsettia image. What do you think?


I took a couple of pictures so you could see the shine as well as the images clearly. Not easy to do with glass!

The images are are coloured using my Prismacolour markers and then cut out. I then stripped the layers of paper until I was left with the thinnest layer of paper with the image on it. I Mod Podge'd everything and added gold damask napkins on the back of it all. The entire works has a couple of coats of clear water based acrylic over it all. The plates will never be able to go through the dish washer, but will withstand hand washing with a little soak.

Plate #2 is in the works. Its totally different from this one!! I can't wait to show it to you!! But...no taking pics of wet glue! Not so appealing when its in that stage, really! Stop by tomorrow for plate #2 of 8!!

Thanks for stopping by!

Hugz and friendship from a very sticky fingered